

Wood veneer wall panels can elevate the interior of any room and enhance it with elegance, modernity, natural wood-inspired beauty, warmth, and texture. From transforming a living room to enhancing a bedroom, to building a chic office wall, the right installation can make all the difference in the world.
Luckily, there is no need to make installing wood veneer wall panels complicated. If you have the correct tools, the correct measurements and the correct technique, homeowners and contractors can get a clean, professional-looking finish.
This guide will teach you how to install wood veneer wall panels, the process of surface preparation, wood panel adhesive selection, panel alignment, panel edge finishing, and how to make a seamless connection.
Why Choose Wood Veneer Wall Panels?
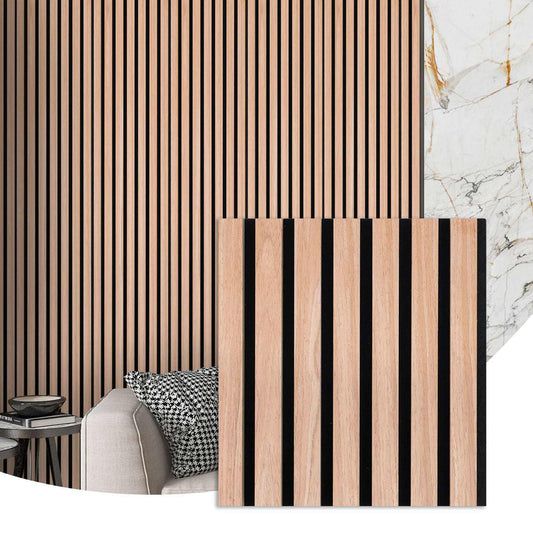
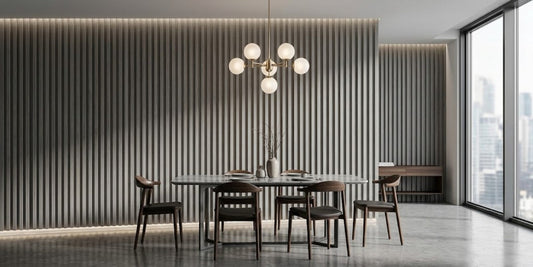
Wood veneer wall panels bring a modern aesthetic, while maintaining the classic charm of wood. Their decorative finishes add warmth to minimalist spaces and match modern furniture, neutral colours, and modern lighting.
Many decorative veneers panels can give a quick update to interior surfaces without the lengthy preparation or finishing that's traditional with wall treatments. Large format panels can also minimise the joints visible, providing for a more seamless look.
At Wall Decor Center, homeowners and contractors can discover the finishes of wood veneer like Walnut, Royal Oak, Blackwood and Ash Wood. They'll help you find the accent wall that suits your interior better and allows you to create a unique accent wall.
 |
 |
 |
Tools and Materials for Installation
Get all of the tools and materials needed before you start your wood veneer panel installation guide. Correct preparation will lead to avoiding uneven placement, unnecessary cuts and gaps visible.
Mostly, you will be required to have a measuring tape, a pencil, a level, a straightedge, the proper cutting tools, construction adhesive, a caulking gun, a clean cloth and protective gear. Additional temporary supports and wood veneer wall panel trim may be required depending on the installation.
Check that any tools, adhesive or method used for installation will suit the particular panel material and wall surface. The preparation of all the elements in advance will make installation more efficient.
How to Install Wood Veneer Wall Panels
Step 1: Prepare the Wall Surface
The key to successful installation is to have a clean, stable and level surface. Clear away dust, loose paint, grease and dirt to prevent interfering with adhesive bonding. Before proceeding, check the wall for any cracks, moisture or unevenness in the wall.
Fill in holes and let the surface dry. New paint may need more curing time for the installation of the adhesive.
With good preparation, the adhesion will be good and the panels will be levelled properly to the wall so as to avoid any visible imperfections.
Step 2: Measure and Plan the Layout
Take precise measurements of the wall's height and width, taking care to include the space around the electrical outlets, windows and corners. Use these measurements to compare with the panel dimensions to calculate the number of panels and cutting pattern.
To prevent the joints from showing in the wood veneer wall panels, determine the placement of the joints prior to applying the adhesive. Take into account the direction of the decorative grain and how things will look when adjacent panels are joined.
A balanced layout will result in a more professional look. Using a level, mark a straight reference line to guide first panel.
Step 3: Cut Panels to Size
When the layout is complete, make note on the panels of any cuts that may be required. Install cutting equipment as suggested for the type of panel construction and properly support each panel to avoid damaging it.
Take two measurements before cutting and particularly around switches and outlets, and around architectural features. It is important to isolate electrical power before approaching wiring and electrical alterations should be done by an electrician.
When cutting accurately, you can help to ensure consistent edges and a panel fits perfectly around obstacles without gaps.
Step 4: Apply the Right Adhesive
The proper wood veneer wall panel adhesive is critical to making a successful installation. When used for the appropriate panel and substrate, a compatible construction adhesive will offer a strong bond without any visible fasteners.
Always apply according to the instructions of the adhesive manufacturer on the application pattern, coverage, work time and curing time. Temporary supports or other approved means of fastening may be necessary for heavy or large format panels.
Don't use too much glue; it may squeeze out to the edges and impair the aesthetic effects.
Step 5: Position and Secure the Panels
Carefully position the first panel against your marked reference line. Before installing it, based on the adhesive instructions, check how it fits to make sure it is lined up.
Keep installing side-by-side panels, maintaining the joint space as per the manufacturer's specification. Notice the direction in which the grains are going and how they are patterned to build a sense of continuity.
Avoid applying tight forces to panels where there is a need for expansion clearance. To create a modern and refined wall finish, it is imperative to ensure that all the elements are aligned properly and spaced correctly.
Create Seamless Edges With Panel Trim
No matter the utmost care taken when installing panels, there will be some visible transitions at corners, edges or adjacent surfaces. Properly sized and shaped wood veneer wall panel trim allows for cleaner connections and for the protection of the exposed edges.
If a coordinating trim color is selected, this may be used for a polished look when the selected veneer finish is used. Aluminum seamless connectors can also offer a precise juncture between the compatible panels.
Wall Decor Center has an aluminum invisible seamless trim connector in its wood veneer line. Before buying, see if it is compatible and if there are any installation instructions.
The right cuts help to create a unified design, while still keeping the wood surface a focal point.
Tips for a Modern Accent Wall
It's important to design an appealing wood veneer accent wall, as well as install it correctly. Choose a finish to match or harmonize with the decorative features in your room, such as the lighting and furniture around the room and not to clash with the flooring.
Vertical panel layouts can draw attention to the height of the ceiling; horizontal ones can create the illusion of width in some spaces. It is also helpful to keep the grain direction consistent, so as to achieve a harmonious look.
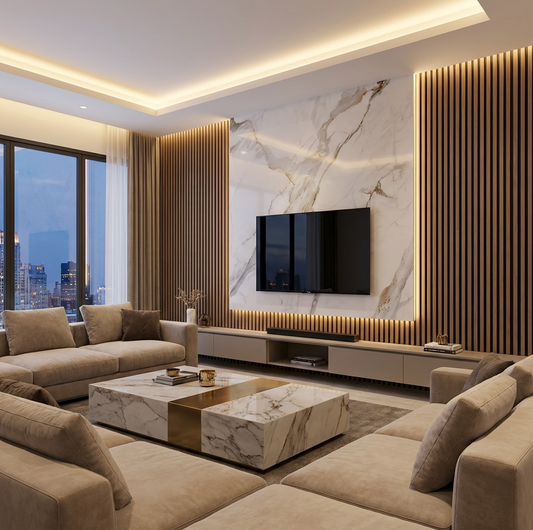
Place panels in the back of a TV or sofa in the living room. Wood veneer can be used to create a warm, natural look in bedrooms, with a feature wall behind the headboard to add some depth to the room.
Once installed, leave the adhesive to set up properly before removing or attaching fixtures to the completed surface.
Conclusion
The successful wood veneer wall panels installation project requires careful preparation, exact measurements, an appropriate adhesive and proper panel alignment. Seamless and modern is what homeowners are looking for and finishing off such details as coordinated trim, well planned joints help achieve this look.
Making the appropriate choice of panels is as significant whether you are renovating your own home or on an interior project for a professional.
Visit Wall Decor Center to find out about the wood veneer wall panel range of decorative finishes and how they can add to a space for warmth, sophistication and contemporary style.
Frequently Asked Questions
1. Can I install wood veneer wall panels myself?
Yes. An installation can be done with appropriate tools, measurements and materials. Large or heavy panels, however, might need extra support to be safely positioned.
2. What adhesive works best for wood veneer panels?
Use an adhesive designed for use with the panel backing and wall surface. Always bond following the panel and adhesive manufacturer's specifications for a reliable bond.
3. How do I make wood veneer panels look seamless?
Create joint positions with precision, have consistent joint placement, coordinate decorative patterns and use matching seamless connectors or finishing trims as needed.
4. Can wood veneer panels be installed over painted walls?
Yes, if the surface is properly primed and the existing paint is securely adhered to the surface, and the surface is suitable for the adhesive manufacturer's requirements. It is important to correct any loose paint, moisture or leveling before proceeding.
5. How do I maintain wood veneer wall panels?
Use a soft cloth and manufacturer-recommended cleaning solutions to clean the surface gently. Don't use abrasive cleaners, over-wet or harsh chemicals, which may strip the decorative finish.
Tags: